Monday, December 5, 2011

Jungle Baby Shower


This weekend I was honoured to make a very special cake. You see....I'm gonna be an auntie! I was asked to make the cake for my sister-in-law's baby shower.

The theme was jungle and I was given these cute stickers for inspiration.


As usual I went online and found a whole bunch of designs for inspiration. This is a particular cake that I fell in love with. I have searched and searched and I can't find it again to include the link.  If this happens to be your work please email me so I can give you credit!

Flawless, and oh so cute!

Anyway, here's my take on it. It was my first time putting a cute little scalloped top on a cake. I really like how that part turned out.  The animals were also really fun and I loved all the little details, especially the monkey with his little banana.


The cake and party were a huge success and I am so excited for this new addition to our family!

Saturday, November 12, 2011

X-Ray Cupcakes


A couple of weeks ago I got a request to make some cupcakes for a friend whose sister is graduating from x-ray technology. I told her I'd do some research and come up with something.

Usually my research starts with google images and this time I really doubted that I would find x-ray cupcakes.

Surprise! I found these, extremely well done, x-ray cupcakes!

Made by Cakeology UK

In order to make them I had to order some food colouring which I prayed would arrive in time and be the right consistency to accomplish the paintings like those in the photo above.

I order a lot of my supplies from Global Sugar Art. They have amazing products and this time it arrived quickly and just in time to make my x-ray cupcakes!

In order to get the paintings done I made the trip to the house of one of my favourite artists, MY DAD! He's got crazy skills and painted these awesome little x-rays.


I am so happy with how they turned out! I've never seen skeletons look so cheery! Dad, thanks so much for your beautiful work on these!


Baby Chicks


I meant to post this a long time ago and then completely forgot about them.
I finally got some photos of those adorable baby chick cupcakes a-la-Martha Stewart.

First I baked up some delicious coconut cupcakes. This recipe calls for ground coconut which I think is what makes them so delicious without the chewy coconut texture. If I could find the recipe I used I would post it here :(

Then I made up some vanilla buttercream with just a touch of cocoa (for colour).
I made the little nests out of toasted coconut and added three little birds with blue buttercream.


The eyes were made with just the smallest dab of melted chocolate.


These cupcakes are a little fussy to make but so cute when they're all done!

Sunday, September 25, 2011

I haven't quit!

I can't believe it's been over a month since I last posted something on here! It is definitely not for lack of baking. Here's what I've been up to.

Elvis cupcakes - yep those delicious treats from this post BACON. After the post I had quite a few requests for these so I took orders and did up a big batch. It worked out really well and I'm thinking of doing a flavour of the month type deal. This would be a great excuse to try new recipes and also allows me to get creative and bake whatever my heart feels like!

Baby bird cupcakes - I made these lovely Martha Stewart Baby Bird cupcakes. In the end the order ended up so rushed that I didn't even get a chance to take a picture. But don't worry, I'll be doing another batch very soon and I promise to take lots of photos!

Here's what Martha's looked like:

source
Sports cupcakes - I made these cuties for a little guy's birthday. Jackson is a big fan of sports, especially hockey so I wanted to do something with that theme.

Well, unfortunately most cake decorating supplies come from the U.S. and they clearly do not think hockey is as important as we do here in Canada. What I finally found was a sports cookie mold made for covering Oreo type cookies in chocolate.

I skipped the cookies and just used chocolate melts to paint the mold and created these cute little hand-painted cupcake toppers.  I really liked the way they turned out.


I have some fun projects coming up in the next couple of weeks so check back soon.  I promise it won't take another month before I post again.

Saturday, August 20, 2011

Motorcycle cupcakes

I always find it a little challenging to make masculine cupcakes. It's easy to stick a flower, heart or even a tiny shoe on top of a cupcake but what do you do for a dude?

Put a Harley on top!!!


I was really happy with how these little bikes turned out. They were inspired by these and the flames were inspired by these. I often find my inspiration on Cake Central or Google images.


Has anyone else made cupcakes for men? I usually try to focus more on a flavour theme for men than the decorations.

BACON!

This week was my good friend and running buddy Joanne's birthday. Joanne has a passionate love for bacon! She burns it all off by running and cycling like crazy. She also has a great blog about running that you can find here.

I decided to make some very special cupcakes for Joanne. They are called Elvis cupcakes, based on the foods that Elvis loved including bananas, peanut butter and bacon.


I started with banana cupcakes. These are more fluffy than a regular banana muffin but still have that delicious banana flavour. I found this recipe and altered it a little by using regular milk and a little less baking soda (I often find I can taste the baking soda when a recipe calls for too much).

I topped them with Peanut Butter Dream buttercream. This is one of my favourite recipes and I use it a ton!!

Finally, the best part, CANDIED BACON!!

To make it you just cover regular bacon with a thin coat of brown sugar.


Make sure to line your pan with foil or you will have a terrible mess to clean up. Put the bacon on a wire rack and bake at 350 degrees.


  I can't remember how long this took but I checked on it often and took it out when it was lightly crisped. Let it cool and then cut into small pieces.


Here's Joanne with her sweet and savory treat! Happy Birthday Joanne!!!


Friday, August 5, 2011

Experimenting!

Last week I had 3 projects that just ended up working out perfectly together!

Engagement BBQ:
1 dozen key lime

1 dozen red velvet
1 dozen my choice

Chiropractor:
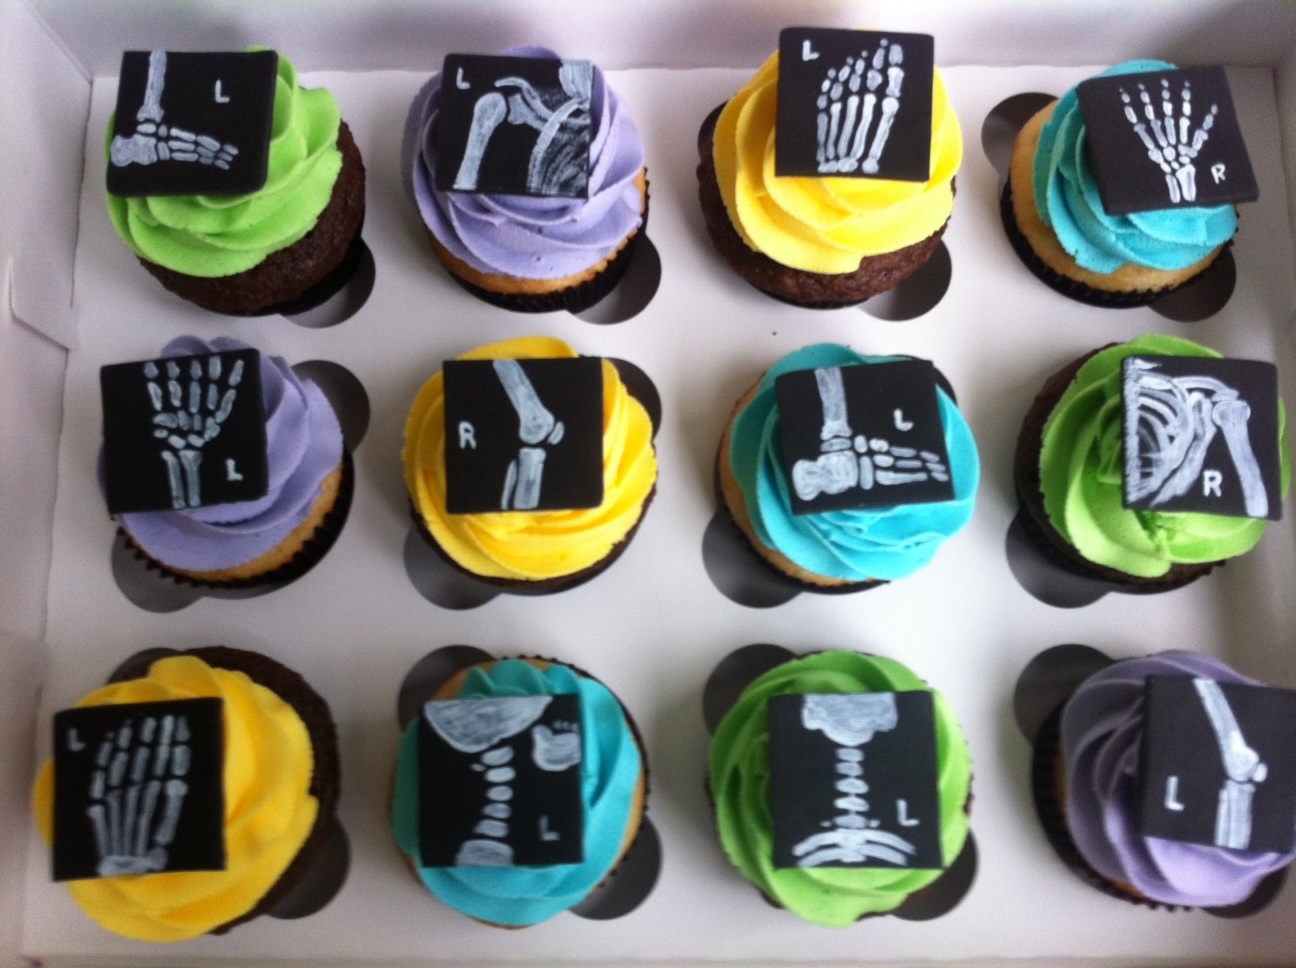
1 dozen of anything I felt like making

Parents anniversay:
A surprise for my family

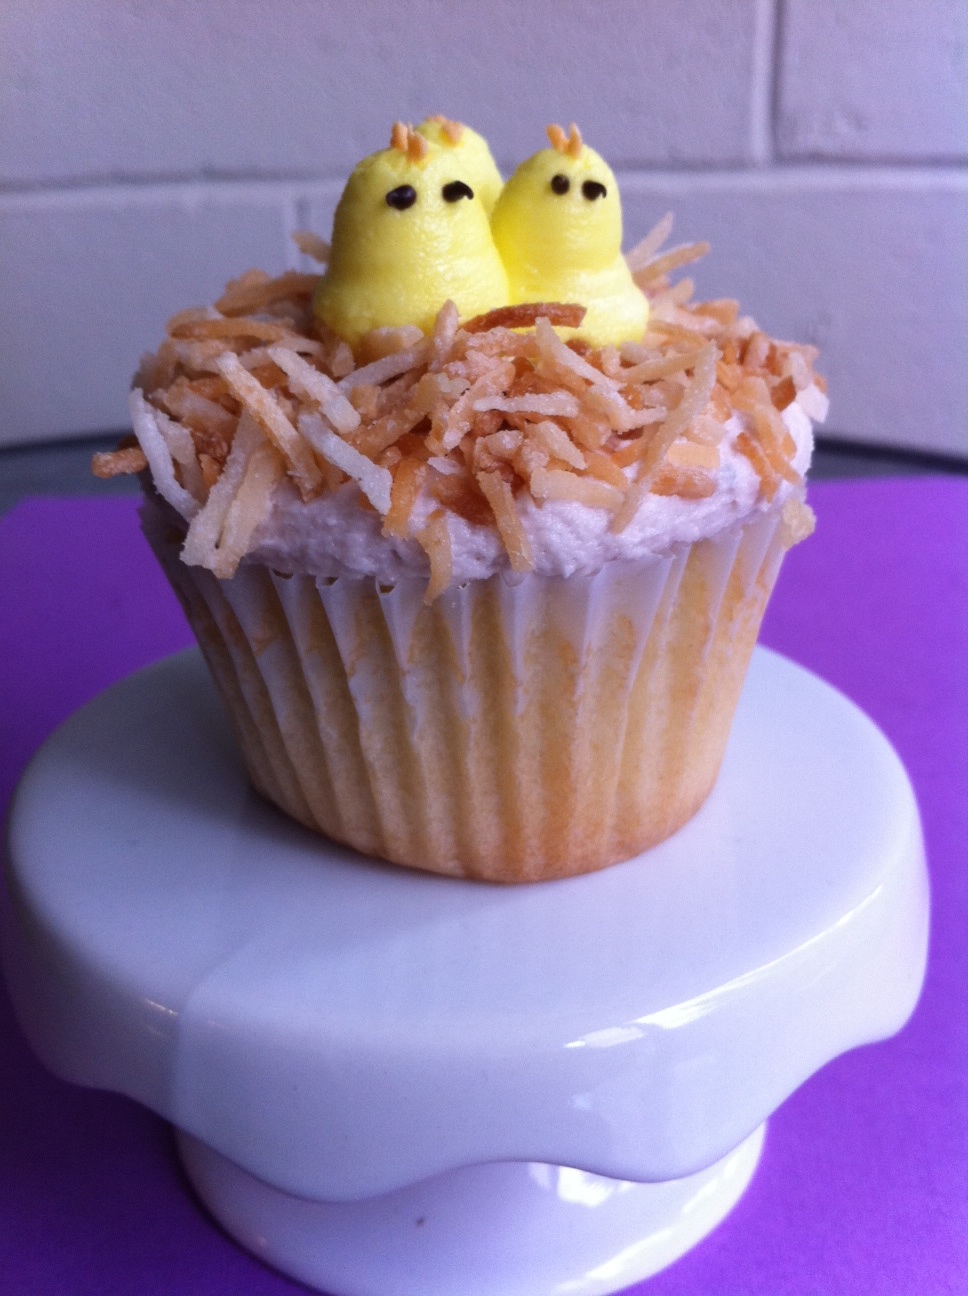
Since most recipes make 2 dozen cupcakes, this worked out perfectly! I decided to make the third flavour a toasted coconut creation.

I started with the red velvet. I decided to try Martha Stewart's recipe. BAD IDEA!! It took over an hour before they were ready to go in the over and when I tasted them, they were disgusting! I ended up throwing them all out! I'm pretty sure I followed the recipe exactly but they just tasted like baking soda.

Then I started again with Bakerella's recipe. This took about 10 minutes, they were a better colour and tasted delicious!


I added some classic cream cheese buttercream and fondant flowers. Voila!


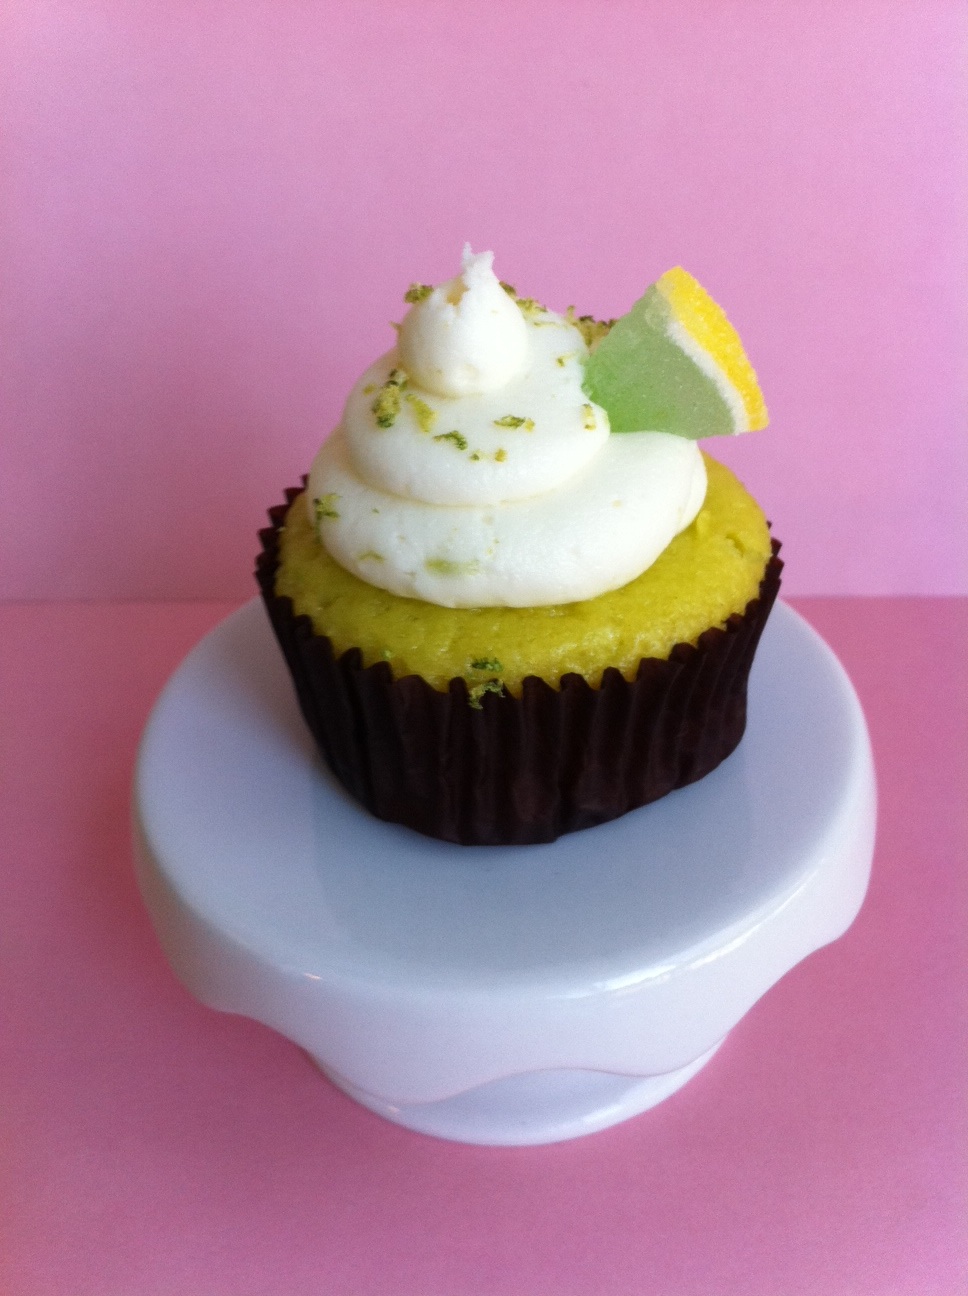
Next were the key lime cupcakes. I searched through tons of recipes and finally ended up mixing and matching a number of different recipes. I also added just a touch of leaf green food colouring. I loved the colour of the cake itself.


I added some vanilla buttercream that was flavoured with key lime juice and lime zest and decorated with a wedge of lime gummy candy and some more key lime zest.


Lastly I made the coconut cupcakes. These called for reduced coconut milk which took a LONG time to make. You have to boil coconut milk on the stove for 45 minutes until it reduces and gets thick. Then it goes in the fridge for a couple of hours until it separates. What you are left with is the most rich and delicious liquid that you add to the batter and the icing. They were decorated with toasted coconut.


I ended up filling all three orders for the weekend with variety packs of cupcakes! Most people loved the red velvet and the key lime and liked the coconut. I'm gonna have to work on that one.

What is your favourite cupcake flavour/recipe??  What should I try next?

Sunday, July 10, 2011

Wedding Weekend!


This weekend was the wedding of some very good friends of mine. I was honored that they asked me to make the cupcakes and cake for their reception. We decided to go with chocolate cupcakes with peanut butter frosting and lemon cupcakes with lemon buttercream icing. We also decided on a little cake for the top of the display. In total there were 200 cupcakes and a 6 inch square cake.


The order all packed up and ready to get loaded in the truck.


I had lots of help on this project.
  • My Mom zested and juiced all of the lemons and lent me her awesome mixer.
  • My friend Lorraine from The Running Room proved to be an expert decorator and skillfully put 6 silver balls on each lemon cupcake.
  • The Husband unwrapped and cut all of the mini peanut butter cups.
  • My in-laws stored the 200 cupcakes in their fridge and freezer for us until I could deliver them to the venue.
  • My dear friend Claudia helped me set up the display and she took the beautiful photos at the end of this post. 

Lorraine, working hard!

I am so lucky to have such great friends and family, I wouldn't be able to do all of this without you guys!!

Here are the goods!


Sunday, June 26, 2011

Cake Pops!


A couple of weeks ago I lost my mind and volunteered to make gifts for all of the volunteers at our school. Turns out we had more than 40 volunteers this year!

I decided to attempt to make cake pops. This lady is the queen of cake pops, I even have her book.


It took a while to get the hang of things and find a good system. After a few delicious casualties, I had a pretty good system down. Each volunteer will be getting 2 cake pops and a handwritten thank you letter from the students.

In total, I made about 120 chocolate cake pops and only ended up eating about 5 myself :)

Saturday, June 25, 2011

TITANIC!


This week I made a delightful cake for a wonderful little guy who just happens to LOVE the Titanic. My little friend Mekhi was turning 4 this week and he wanted a Titanic cake.

Thanks to my wonderful baking assistant who helped to cut out all those little white windows, we got this cake done and delivered before midnight on Tuesday night.

Happy Birthday Mekhi!

Saturday, June 11, 2011

Diva Cupcakes


Last week I got a call from the receptionist at my chiropractors office. Let me just say, this lady is the sweetest thing in the whole world and the main reason we ever went to this chiropractor in the first place. She should be in charge of training all customer service employees!!

Anyway, apparently she is in a singing group and they were having a "Diva" party. One of the girls in her group had also recently got engaged. When I asked Jenny what she would like she said it was completely up to me!!

This is what I came up with. Teeny tiny purses, shoes and a little engagement ring on a pillow.

P.S. These less than stellar photos were taken using my iphone. If anyone knows of a used DSLR camera for sale, I am VERY interested!

Thursday, June 2, 2011

Tea Party


This week was my current principal's retirement party. The plan was a very casual tea party. Well, it turned into a beautiful art gallery/tea party.

When I was trying to decide what I wanted to make I had to consider the very short amount of time I would have, how far in advance I would have to make the cake and Judy's personal style.

I started with two 8 inch round vanilla cakes and two 6 inch round vanilla cakes. After the cakes are baked they are frozen and leveled.

Next, the cakes were filled with Lemon Curd filling using Judy's own delicious recipe. The cakes were then lightly iced in vanilla buttercream.

To get the cakes as smooth as possible I use an ironing technique. I use extra smooth disposable shop towels and a little plastic trowel. After the icing has crusted I rub the trowel lightly, in a circular motion over the entire cake.
Next I covered the cakes in white fondant. At this point I also added 5 dowels to the bottom cake to support the weight of the top layer (forgot to take a photo).

At this point I was not too happy with how much of the base of the top cake I could see. I decided to add a pearl border around the base of both layers. This meant cutting out circles of fondant and rolling them into many, many, little balls.
VOILA!
 Finally, my favorite part, the decorating!!! I can not take all the credit here. I chose a design I had found on the internet and put in my inspiration folder. I chose it because it wasn't overly girly and had a little bit of retro flare.